When processing cases, often associated documents and other files need to be attached to the case for review and use by the agents; for example, contracts, legal documents, identity information of the relevant person or organization, or even voice and phone recordings. Traditionally, systems isolated their data on a locally managed server. Up to version 5.1 of Case Manager, attachments were accessed on a Windows shared location on a local server. For access and isolation this may be a very good idea, but it places a greater responsibility on the IT team to ensure backups of these files are regularly done in addition to the database backup processes. Furthermore, when agents access the attachments on a shared Windows location, client-access licenses are required for each agent accessing the server. With the expanse of cloud-based resources on offer in recent years, there may be a better solution.
In July 2022 we released a new extension that allows agents to access file attachments to cases by making use of FTP (File transfer protocol). Since this is a web-based technology - and with the Report & Document templates now stored in the database in Case Manager 5.2 - client-access licenses are no longer required, which can save you a vast amount on Windows licensing costs.
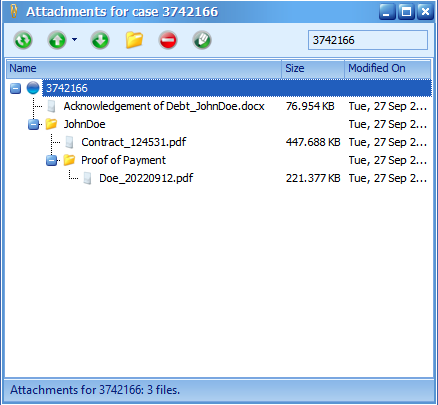
The extension replaces the file-share attachments (which is now also a separate extension in Case Manager 5.2), and provides the agent with a per-case folder where files associated with the case can be managed in a hierarchical structure. Files can now easily be uploaded and downloaded to the attachment location by an action on a case. FTP, however, is not a secure protocol: access may be authenticated but the file transfer is not encrypted. It works great on a local network, but it is not recommended to allow access to the attachments over the internet using FTP.
Version 2.1 of the Attachment FTP Extension features the addition of a second protocol option: SFTP - File transfer protocol over secure shell. This protocol has the same capabilities as FTP, but files are encrypted in the transfer by making use of the SSH protocol.
Recently, Microsoft announced that Azure Cloud Storage now supports the SFTP protocol, which allows you to access case attachments stored in the cloud, leveraging the data redundancy and availability cloud resources provide.
Azure Cloud Storage provides a very wide variety of options for data in the cloud with different levels of availability and redundancy (and of course price tags). For the use case of file attachments to cases a rather basic setup is necessary, however it is highly recommended that you familiarize yourself with the capabilities, options, and features of Azure Cloud Storage.
To set up Azure Cloud storage for SFTP access, review this guide by Microsoft. Here are a few high-level steps:
To set up the Case Manager attachments to access the storage resource created on Azure, ensure that at least version 2.1 of the Attachment FTP Extension is installed by navigating to the Extension Manager in the Configuration Tools. Open the Extension Settings to view the available settings for the extension.
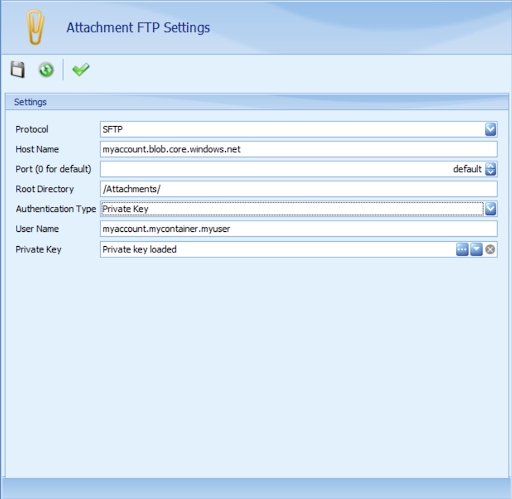
It’s as simple as this! You can verify that the connection details are correct by clicking the verify button on the settings toolbar. If it passes validation, attachments in Case Manager will be saved in Azure Cloud Storage. In Case Manager a new golden paperclip button will appear on the toolbar to access this functionality.